
The login form
The login form
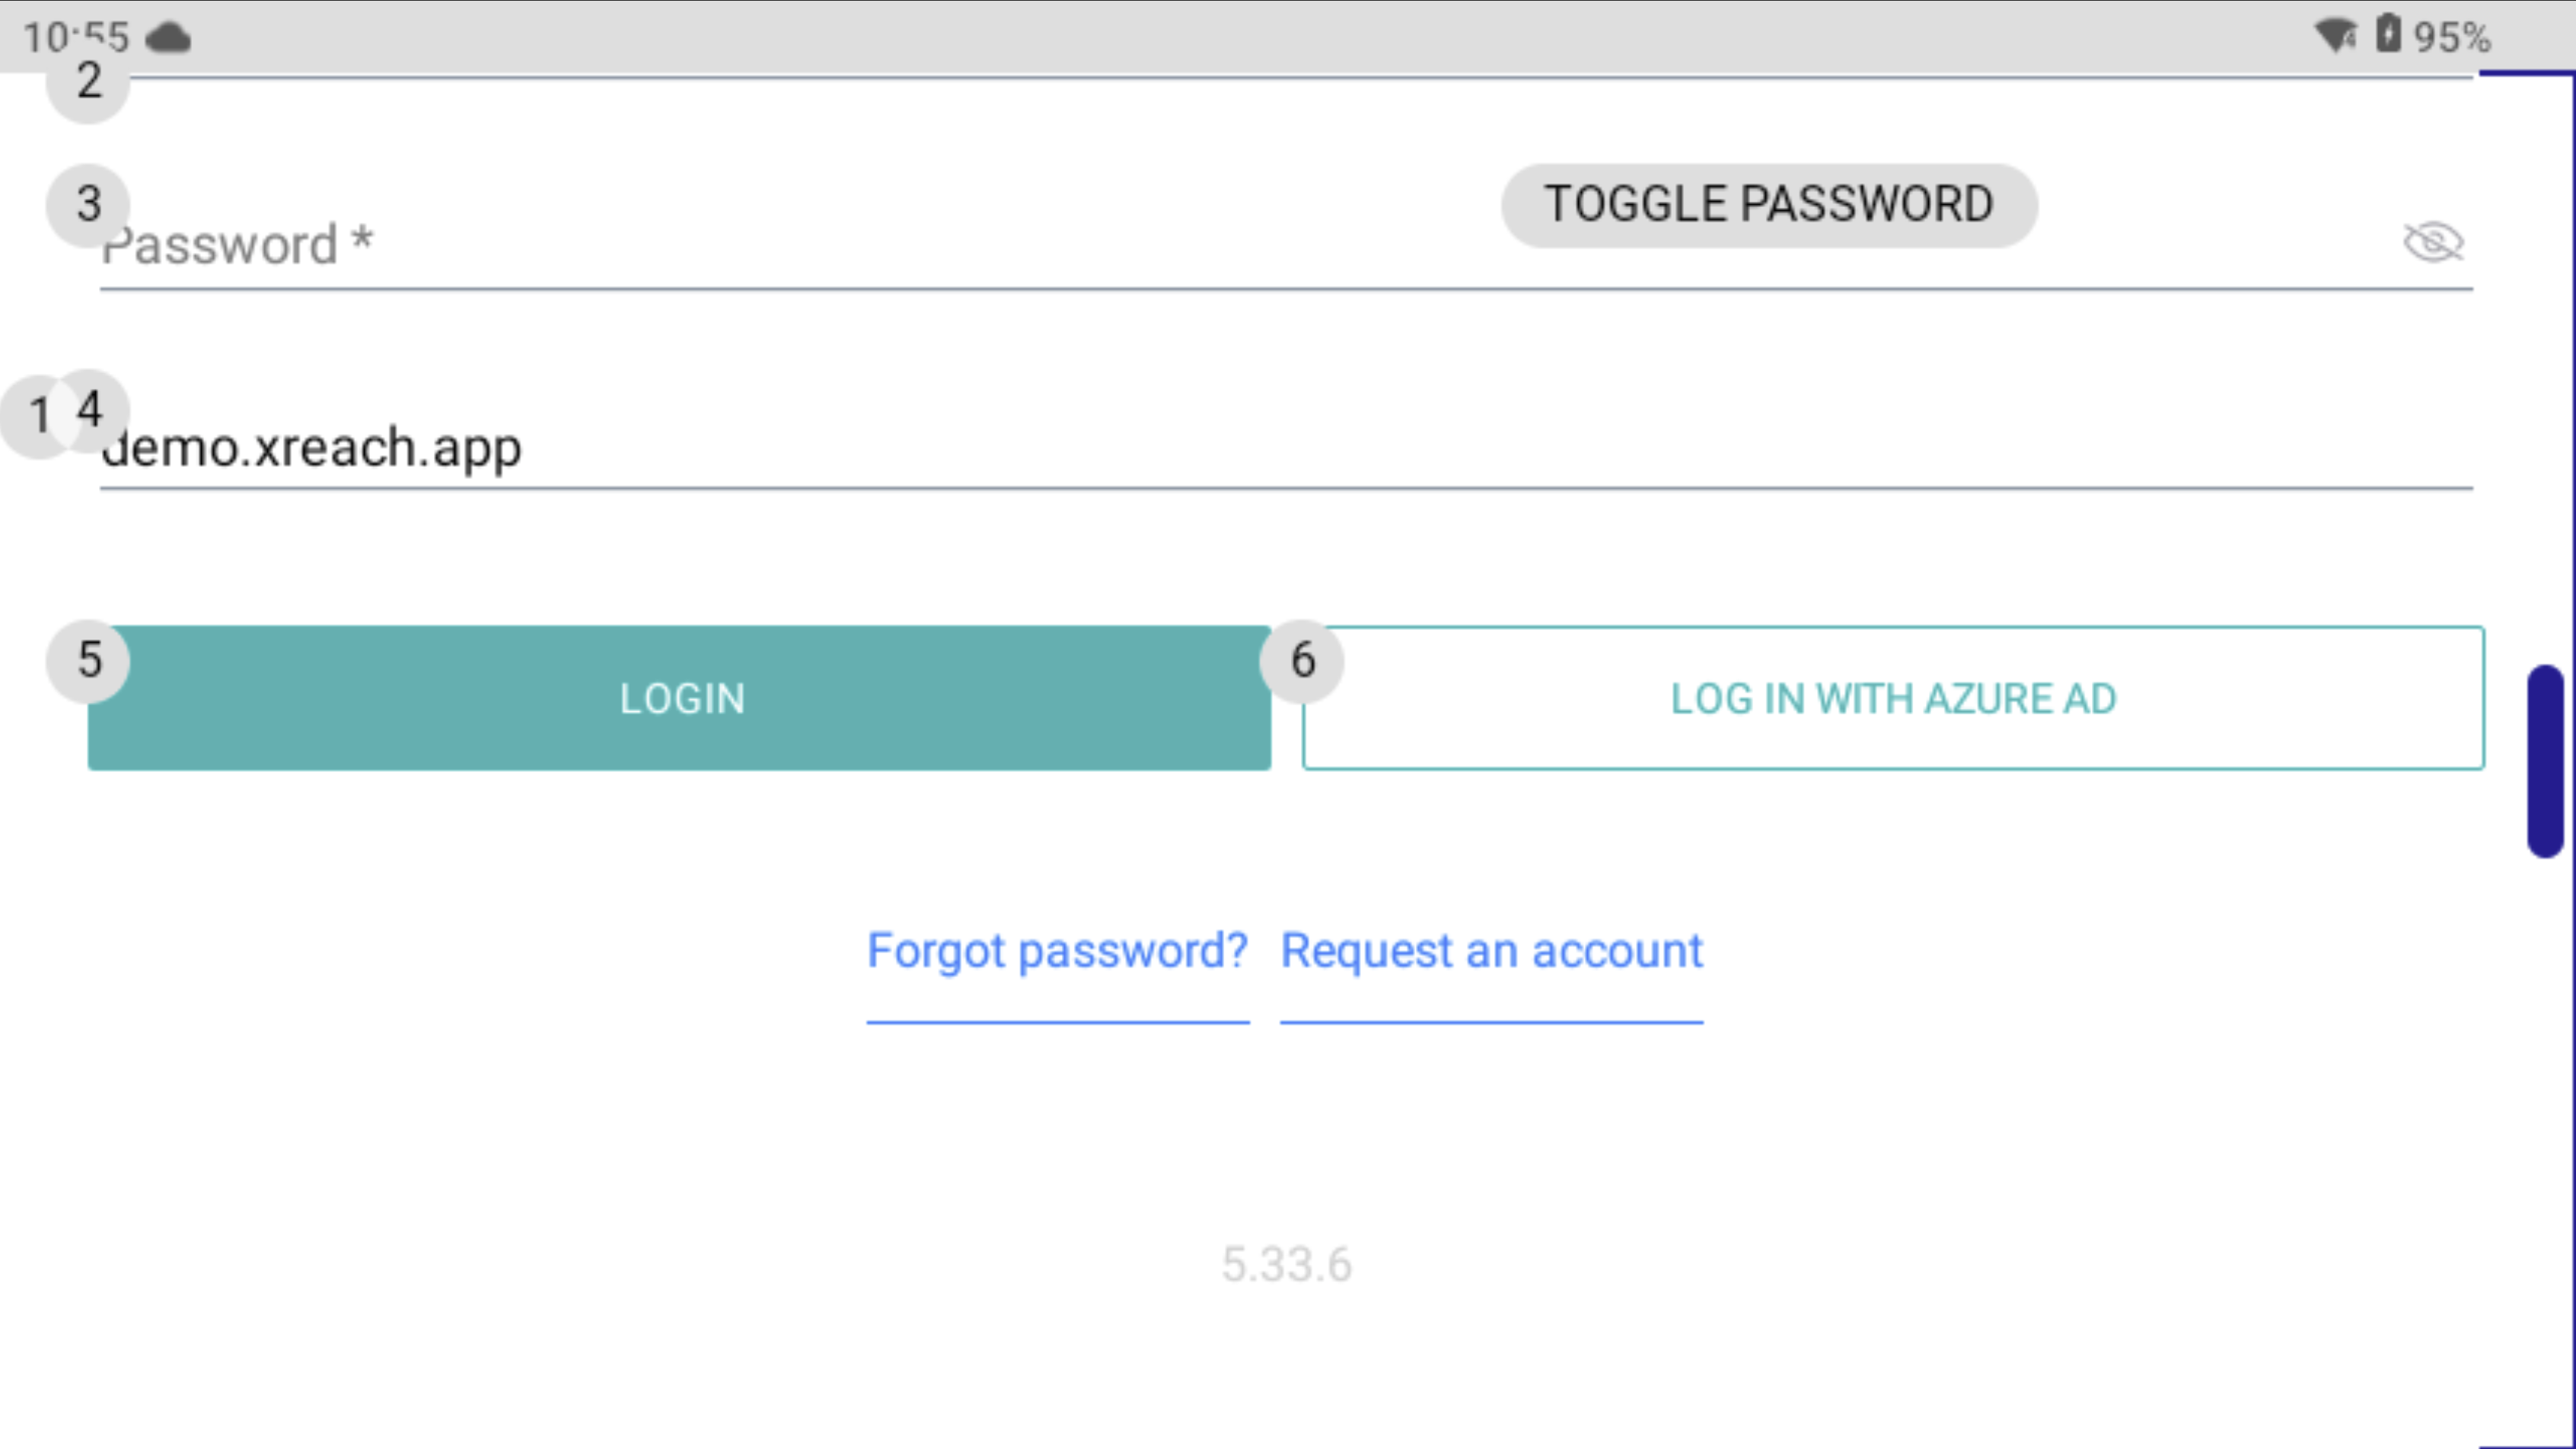
Forgot password and request account options in login form


Ticket creation through a guide

Guide steps filling

Create ticket form

Quick call view with group selection dropdown on the top of the page

Created ticket

Overflow menu

Solution tab

Ticket attachments tab

Attachment actions
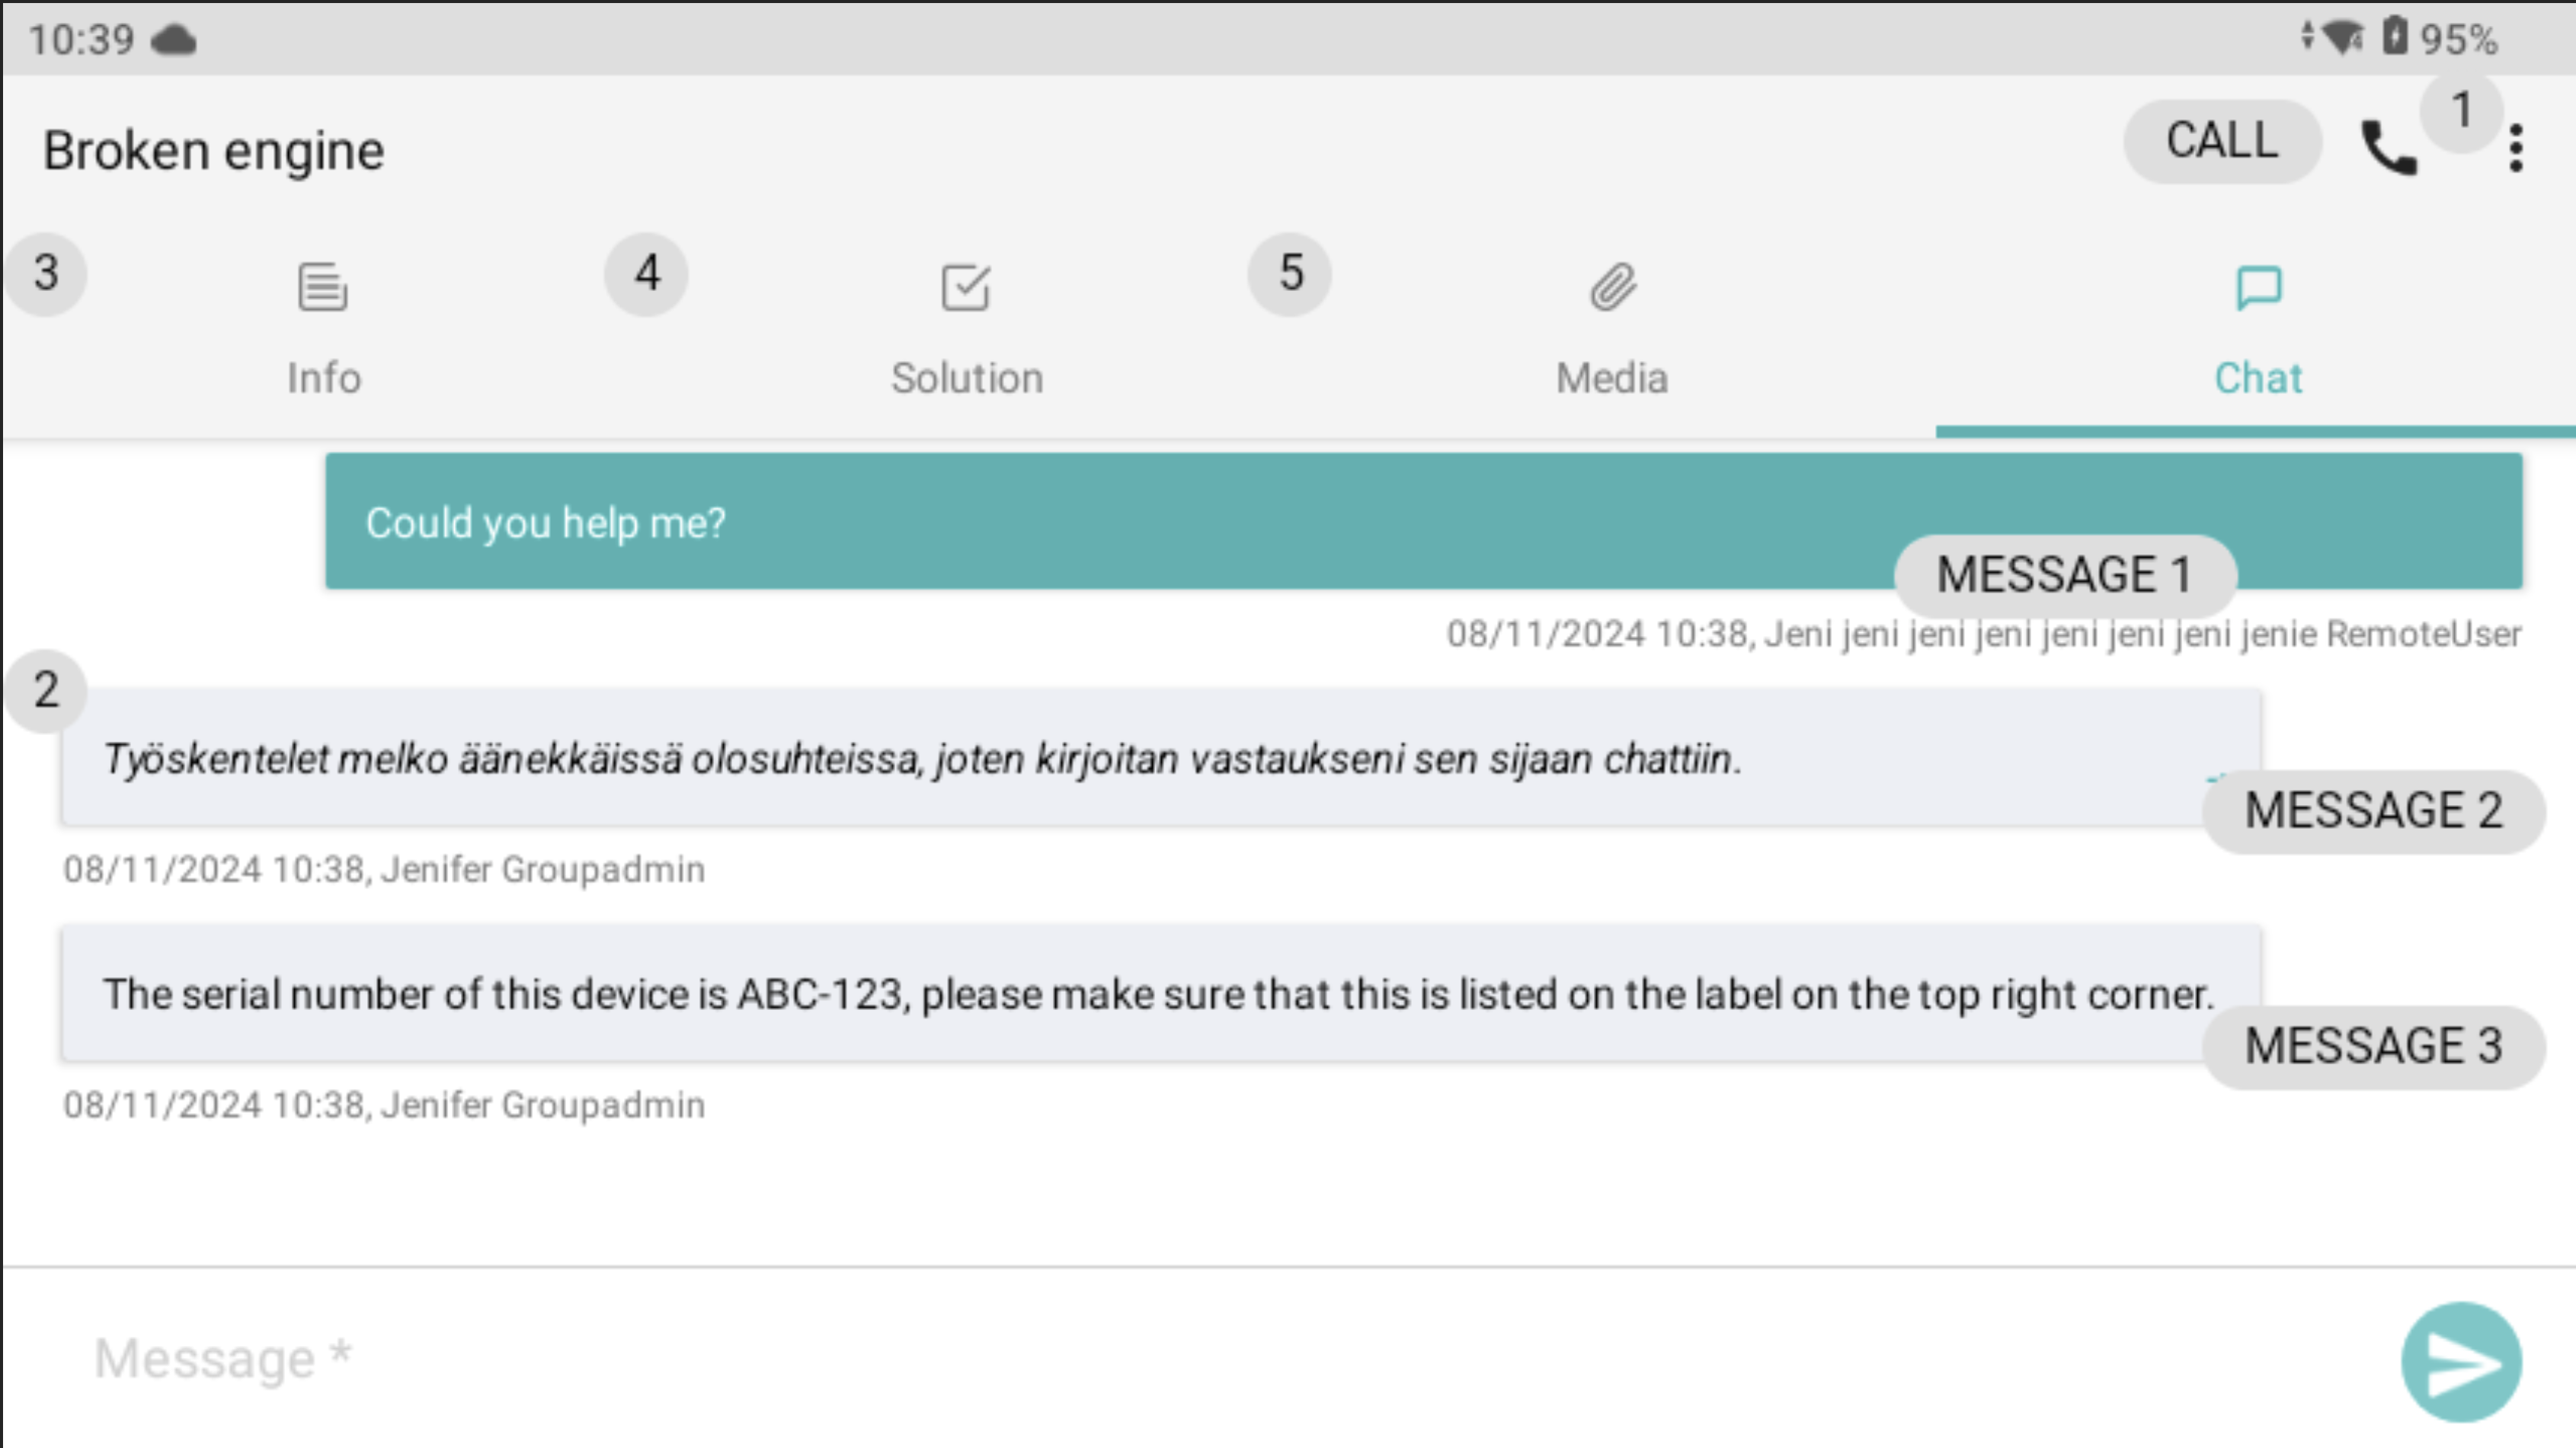
Ticket chat tab

Ticket editing view

Expert list view
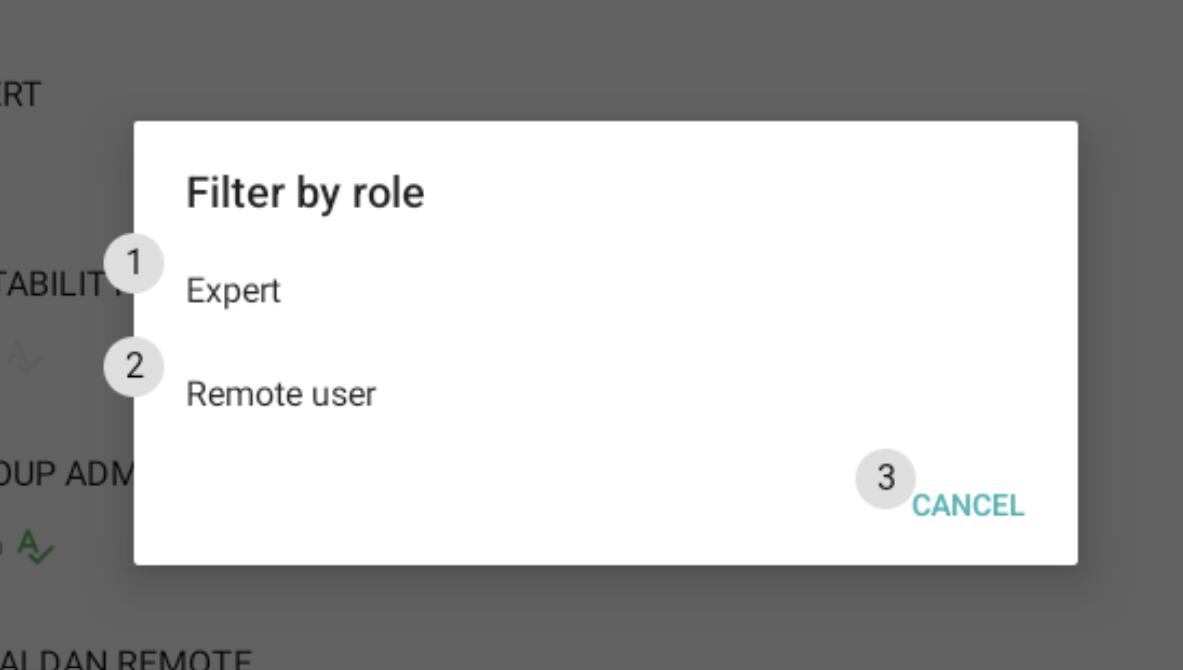

User list for making a call
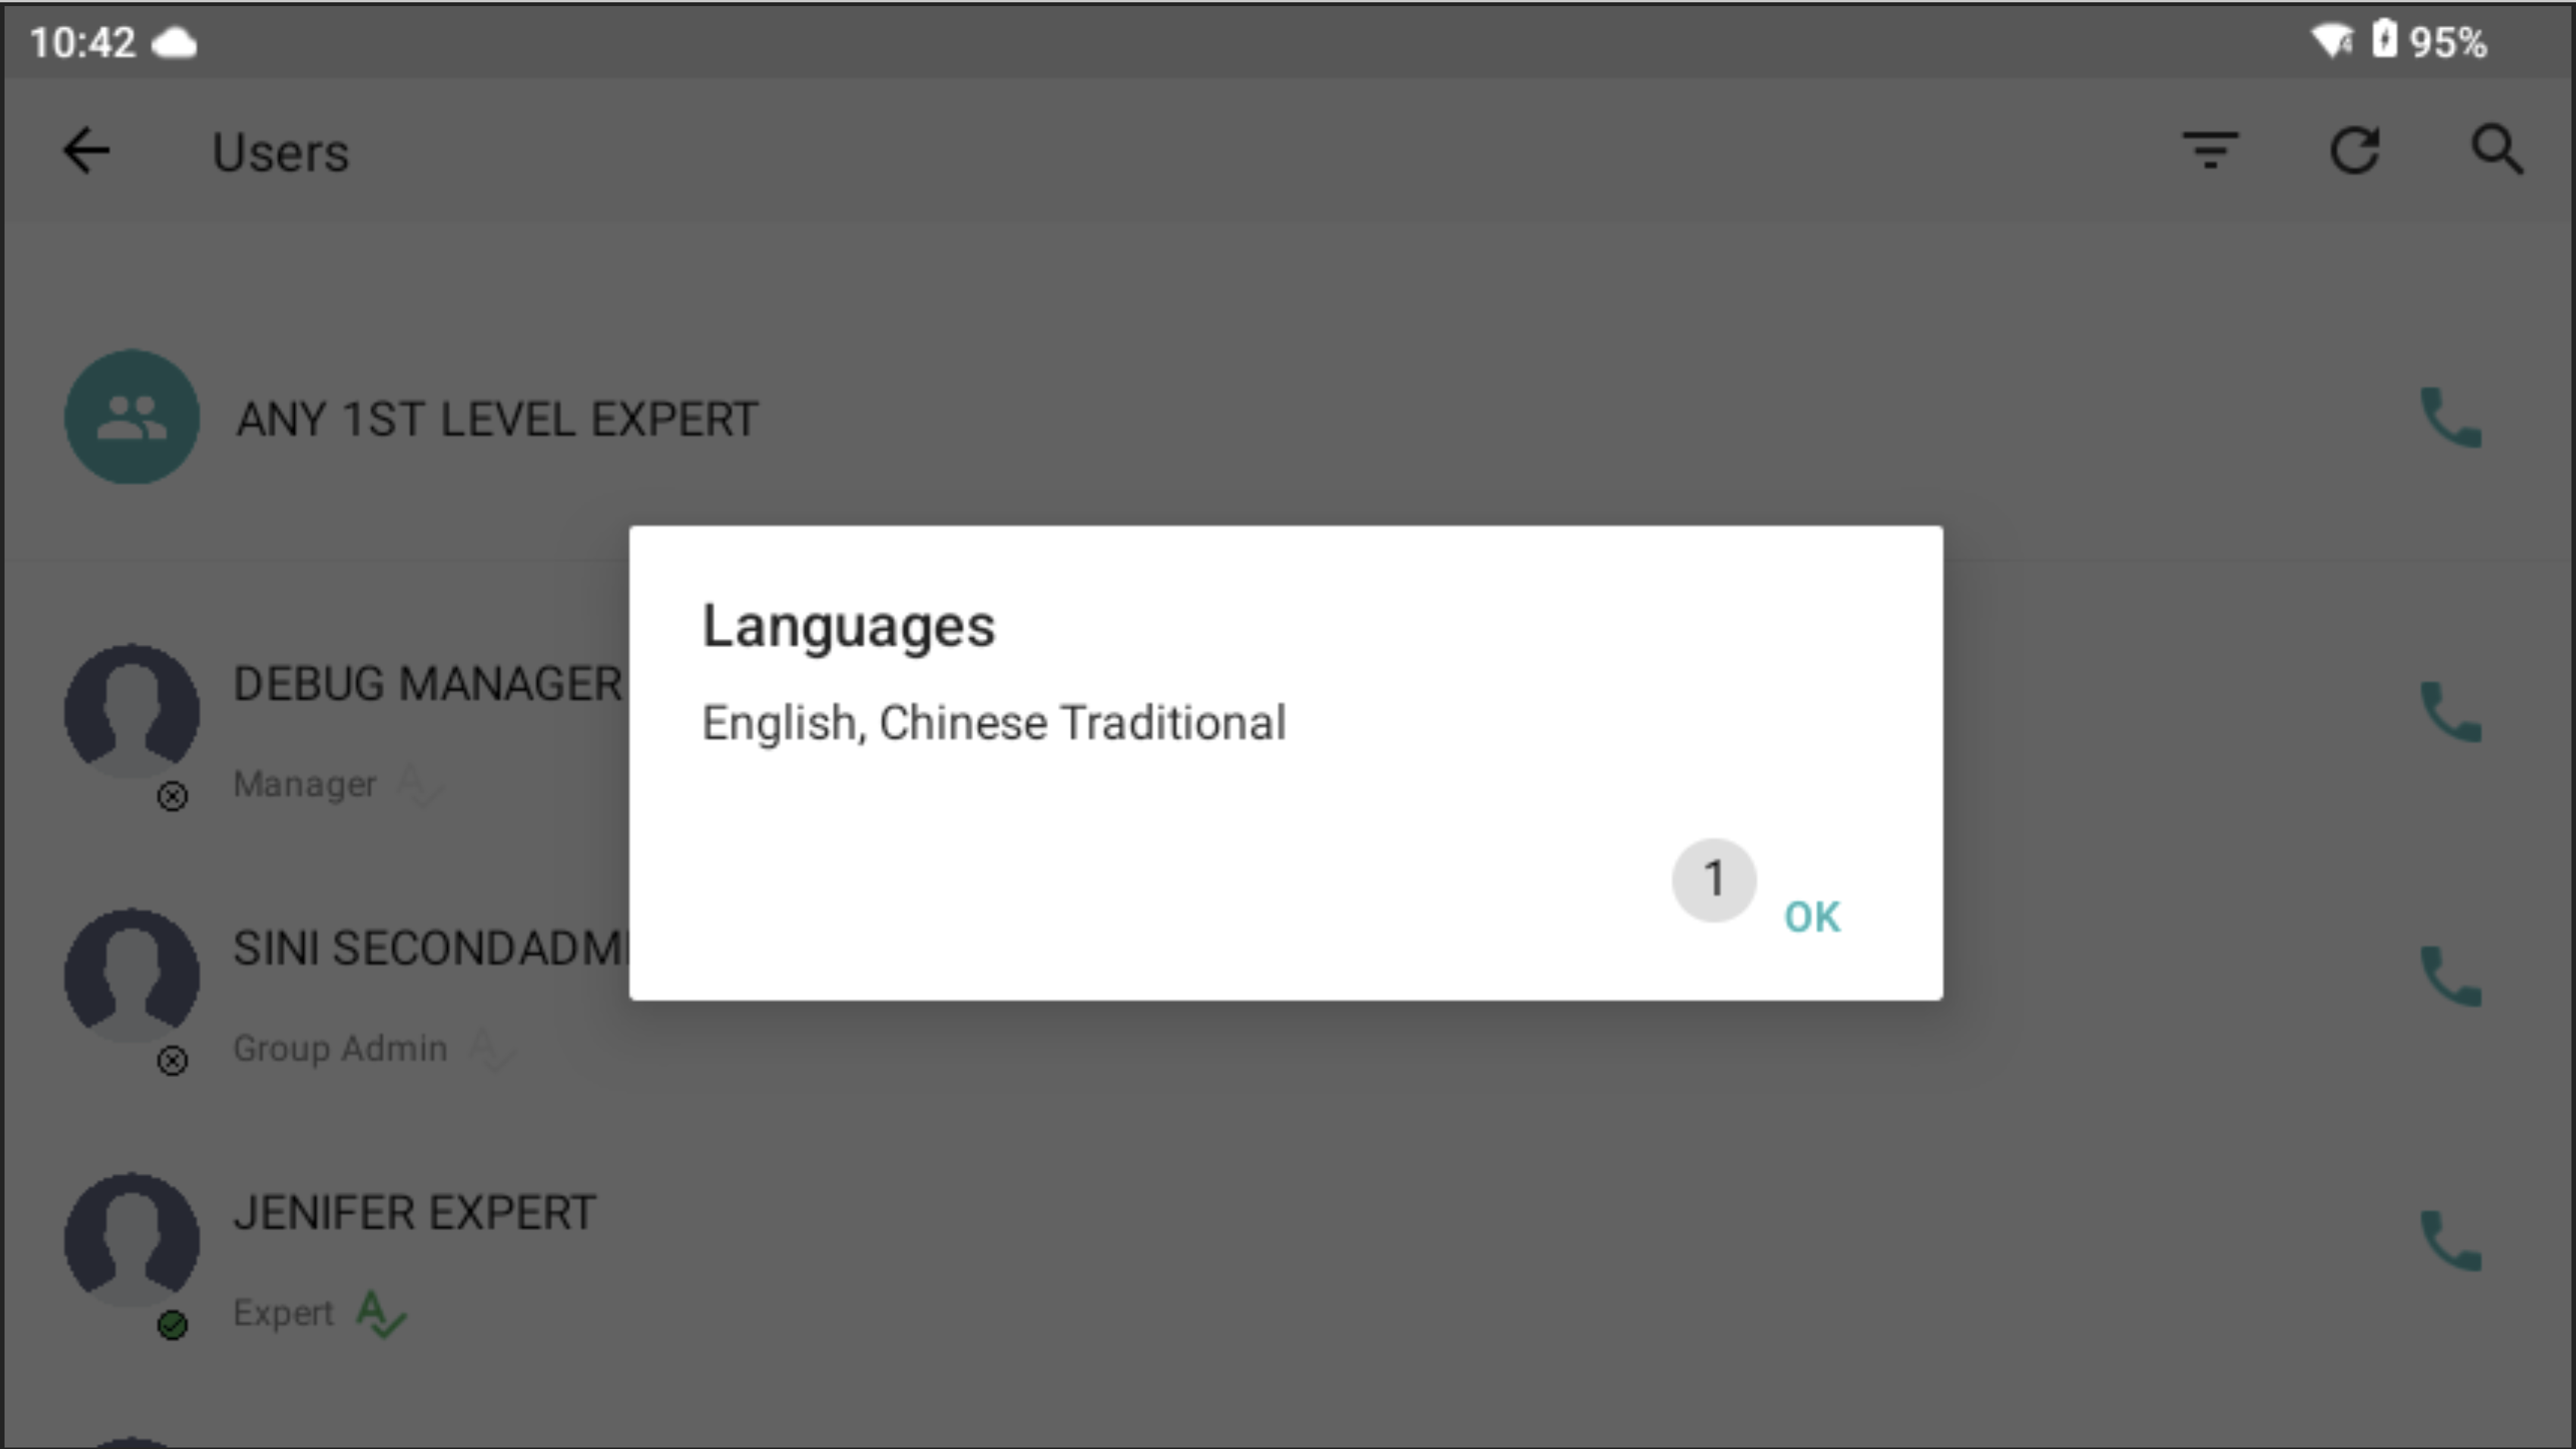
User's language skills
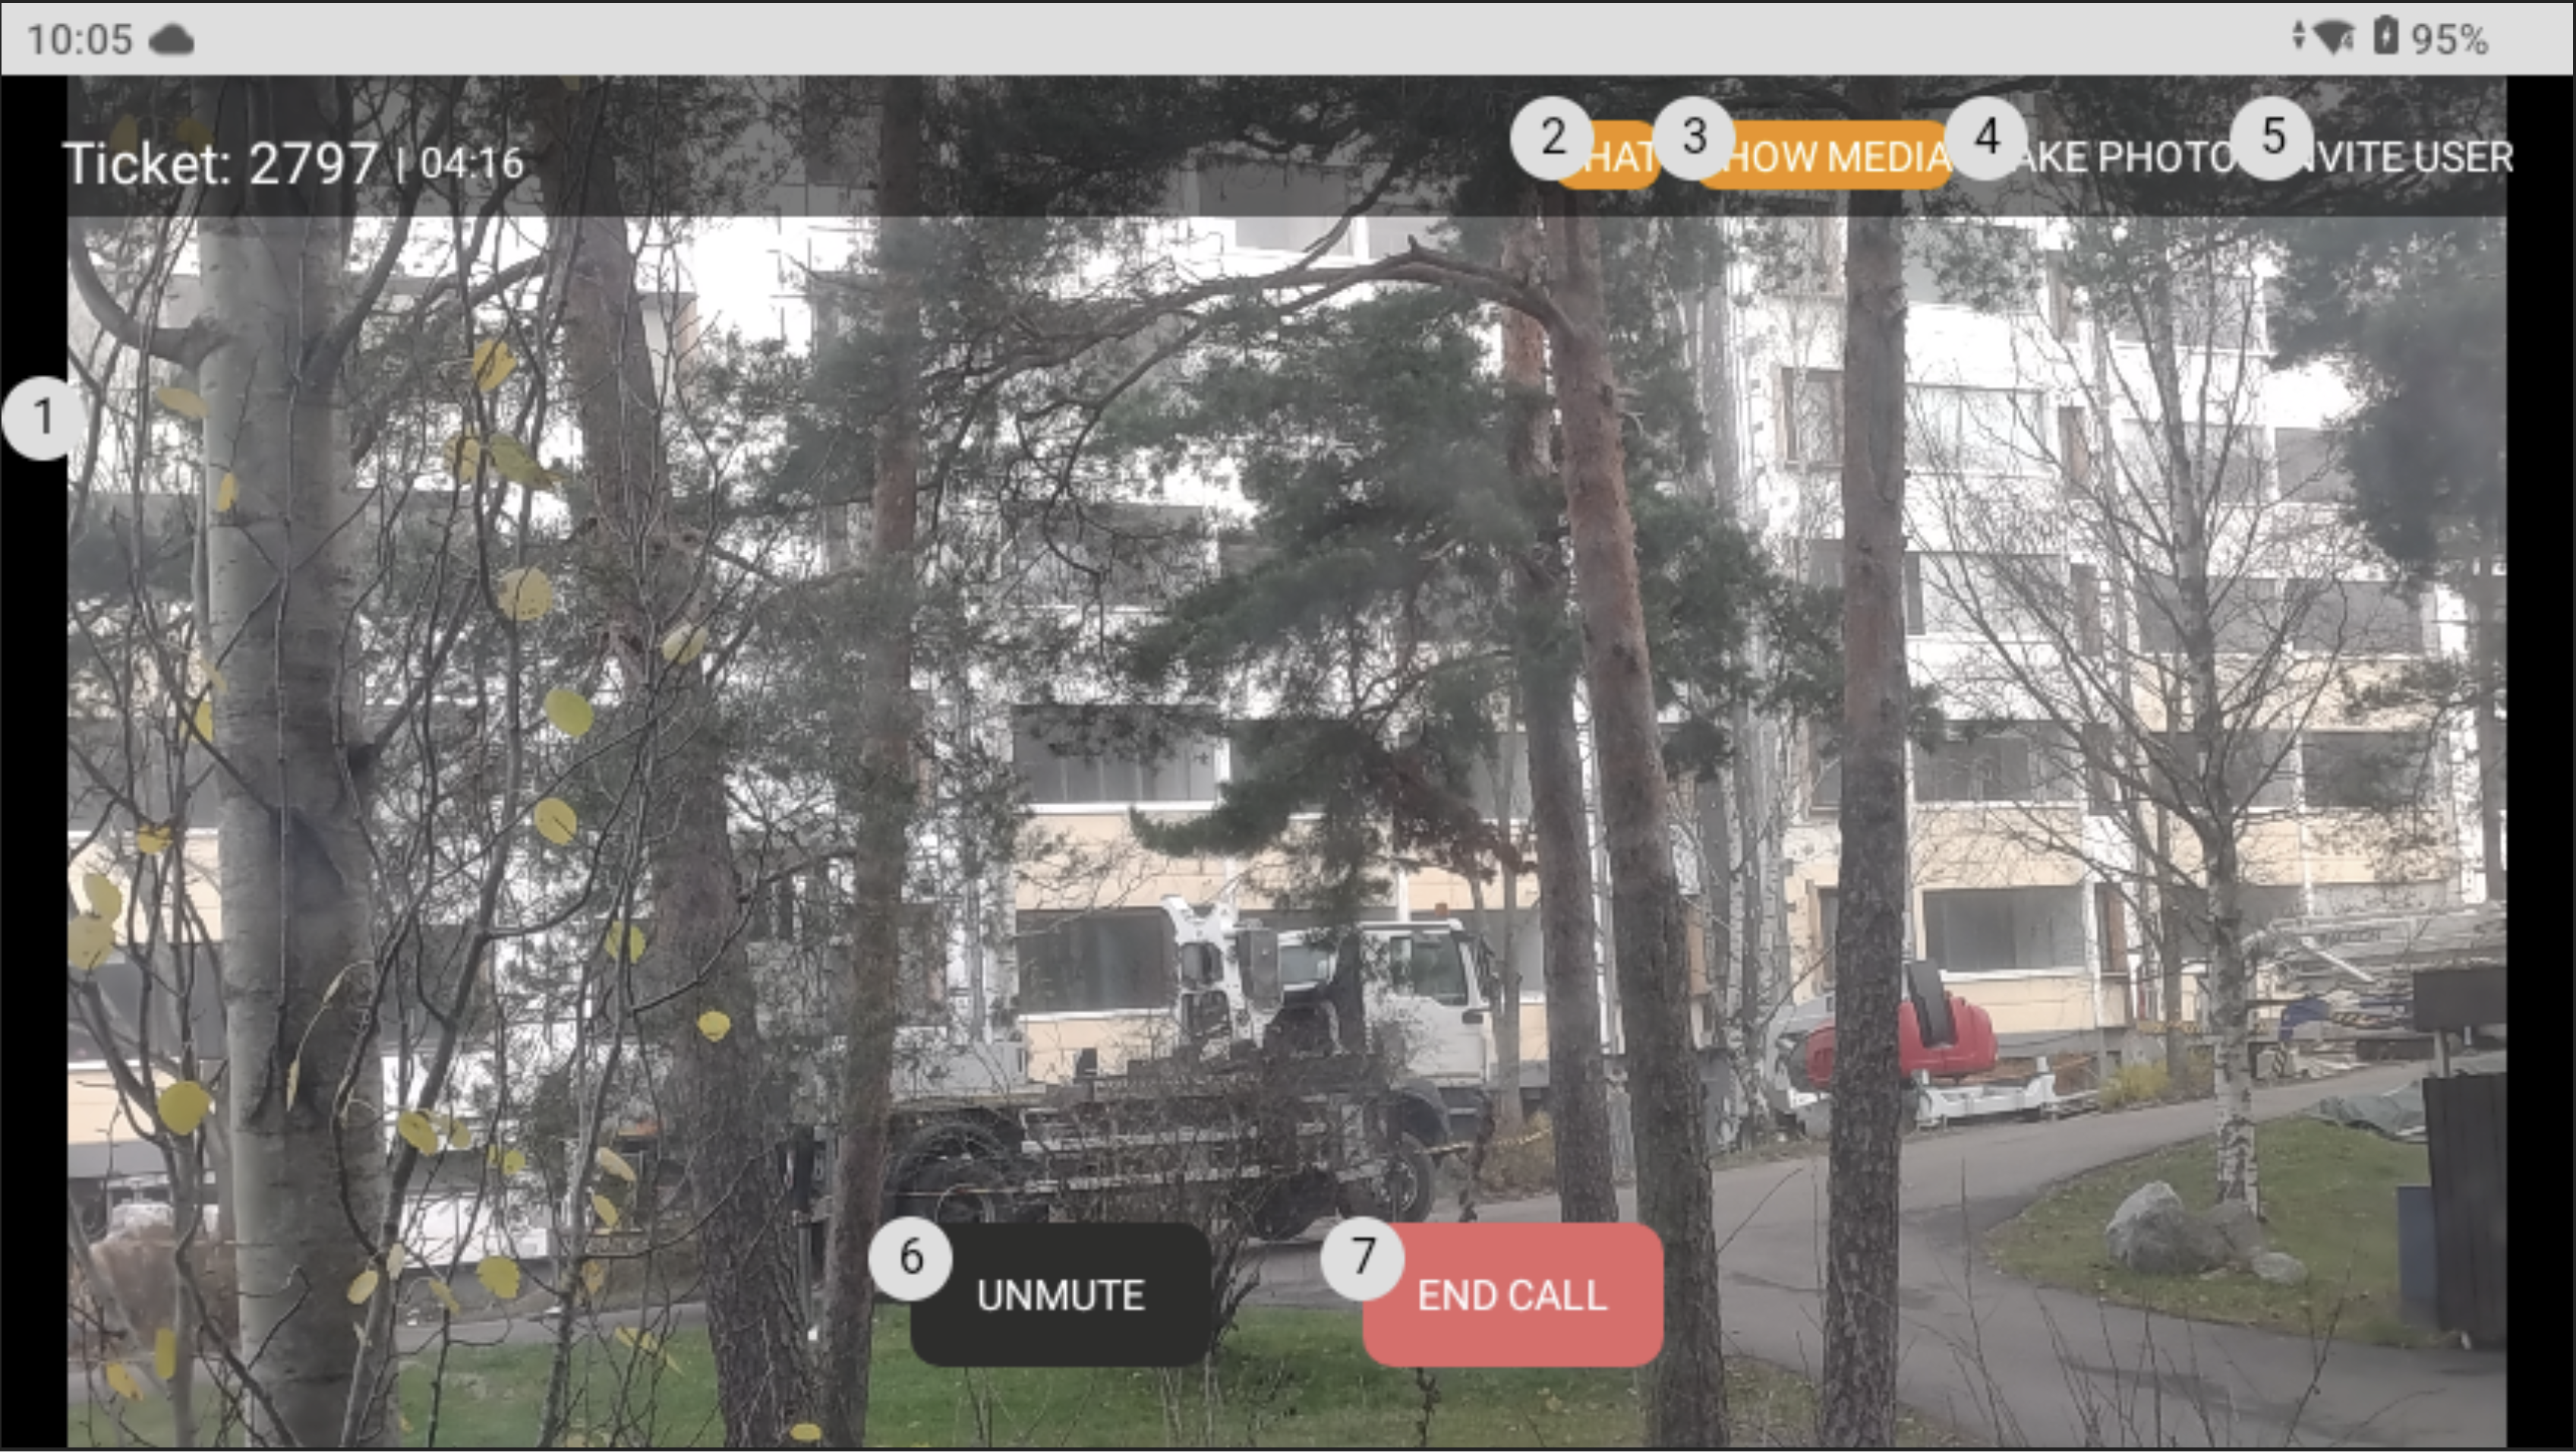
General call view. Orange buttons show that chat and media tabs have new items

During annotation sharing command "Hide annotation" can be used to return to the call view
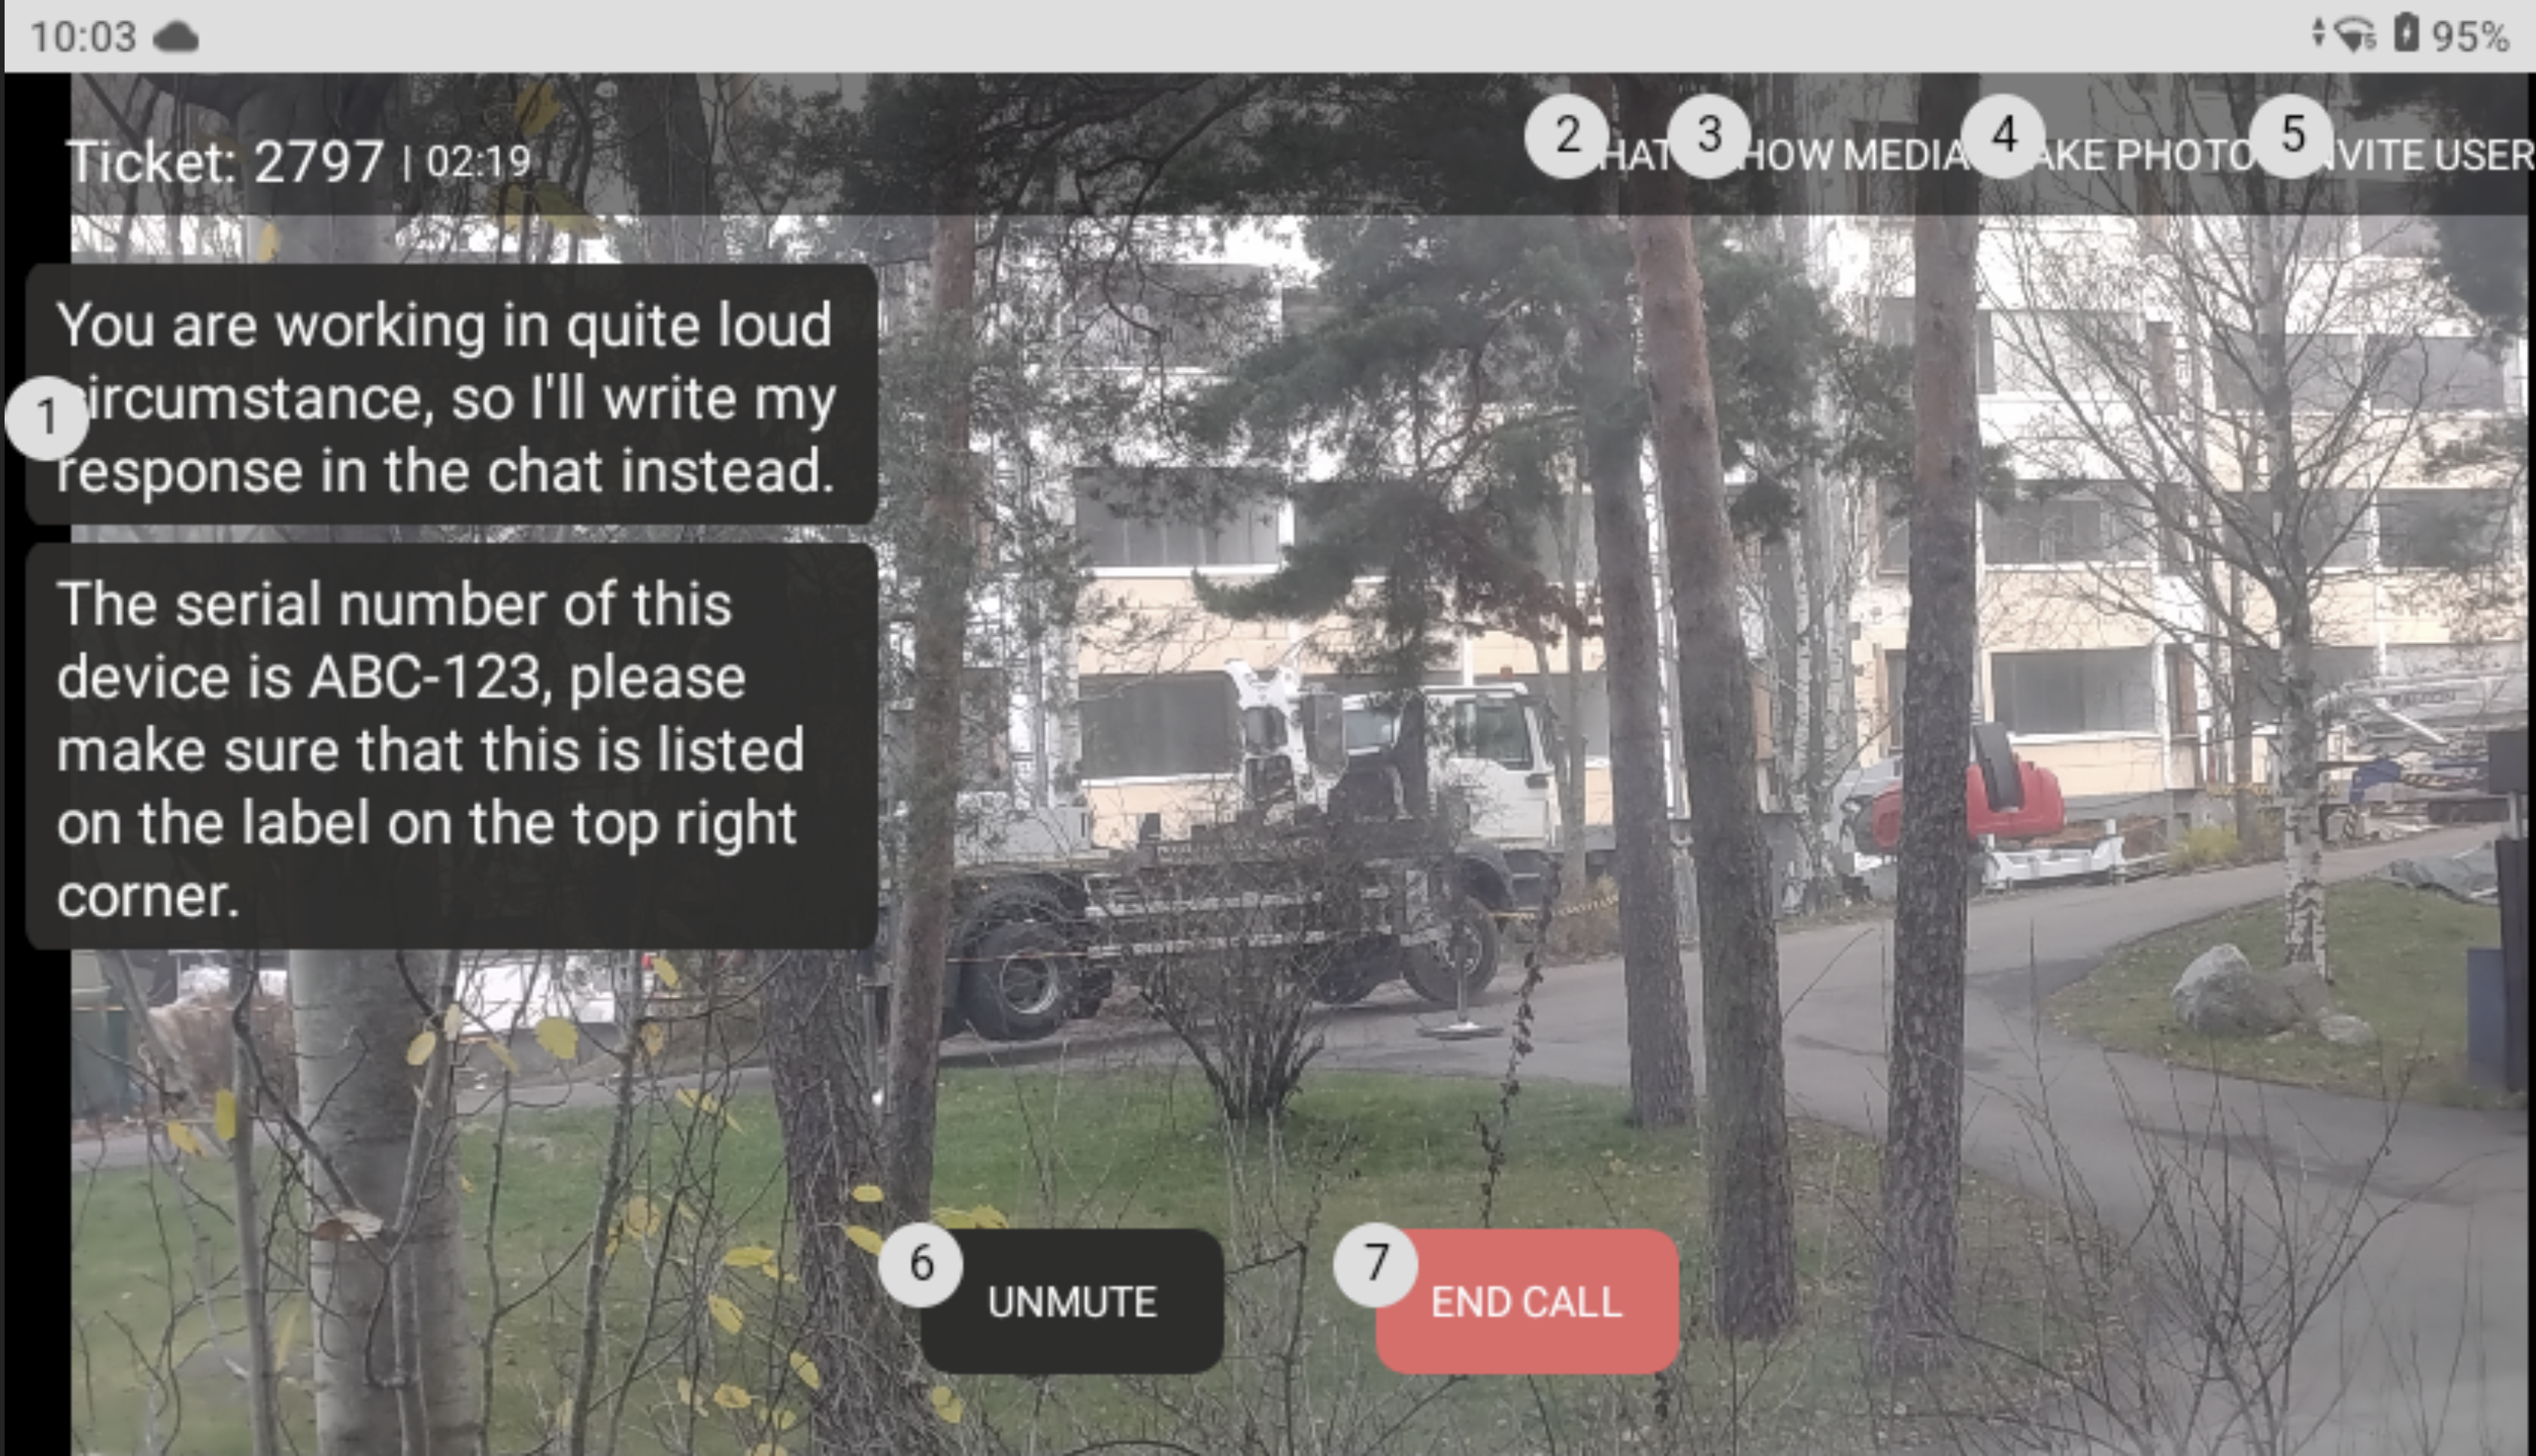
Chat overlay: Messages shown on screen

Incoming call popup

App settings

Reset login details popup
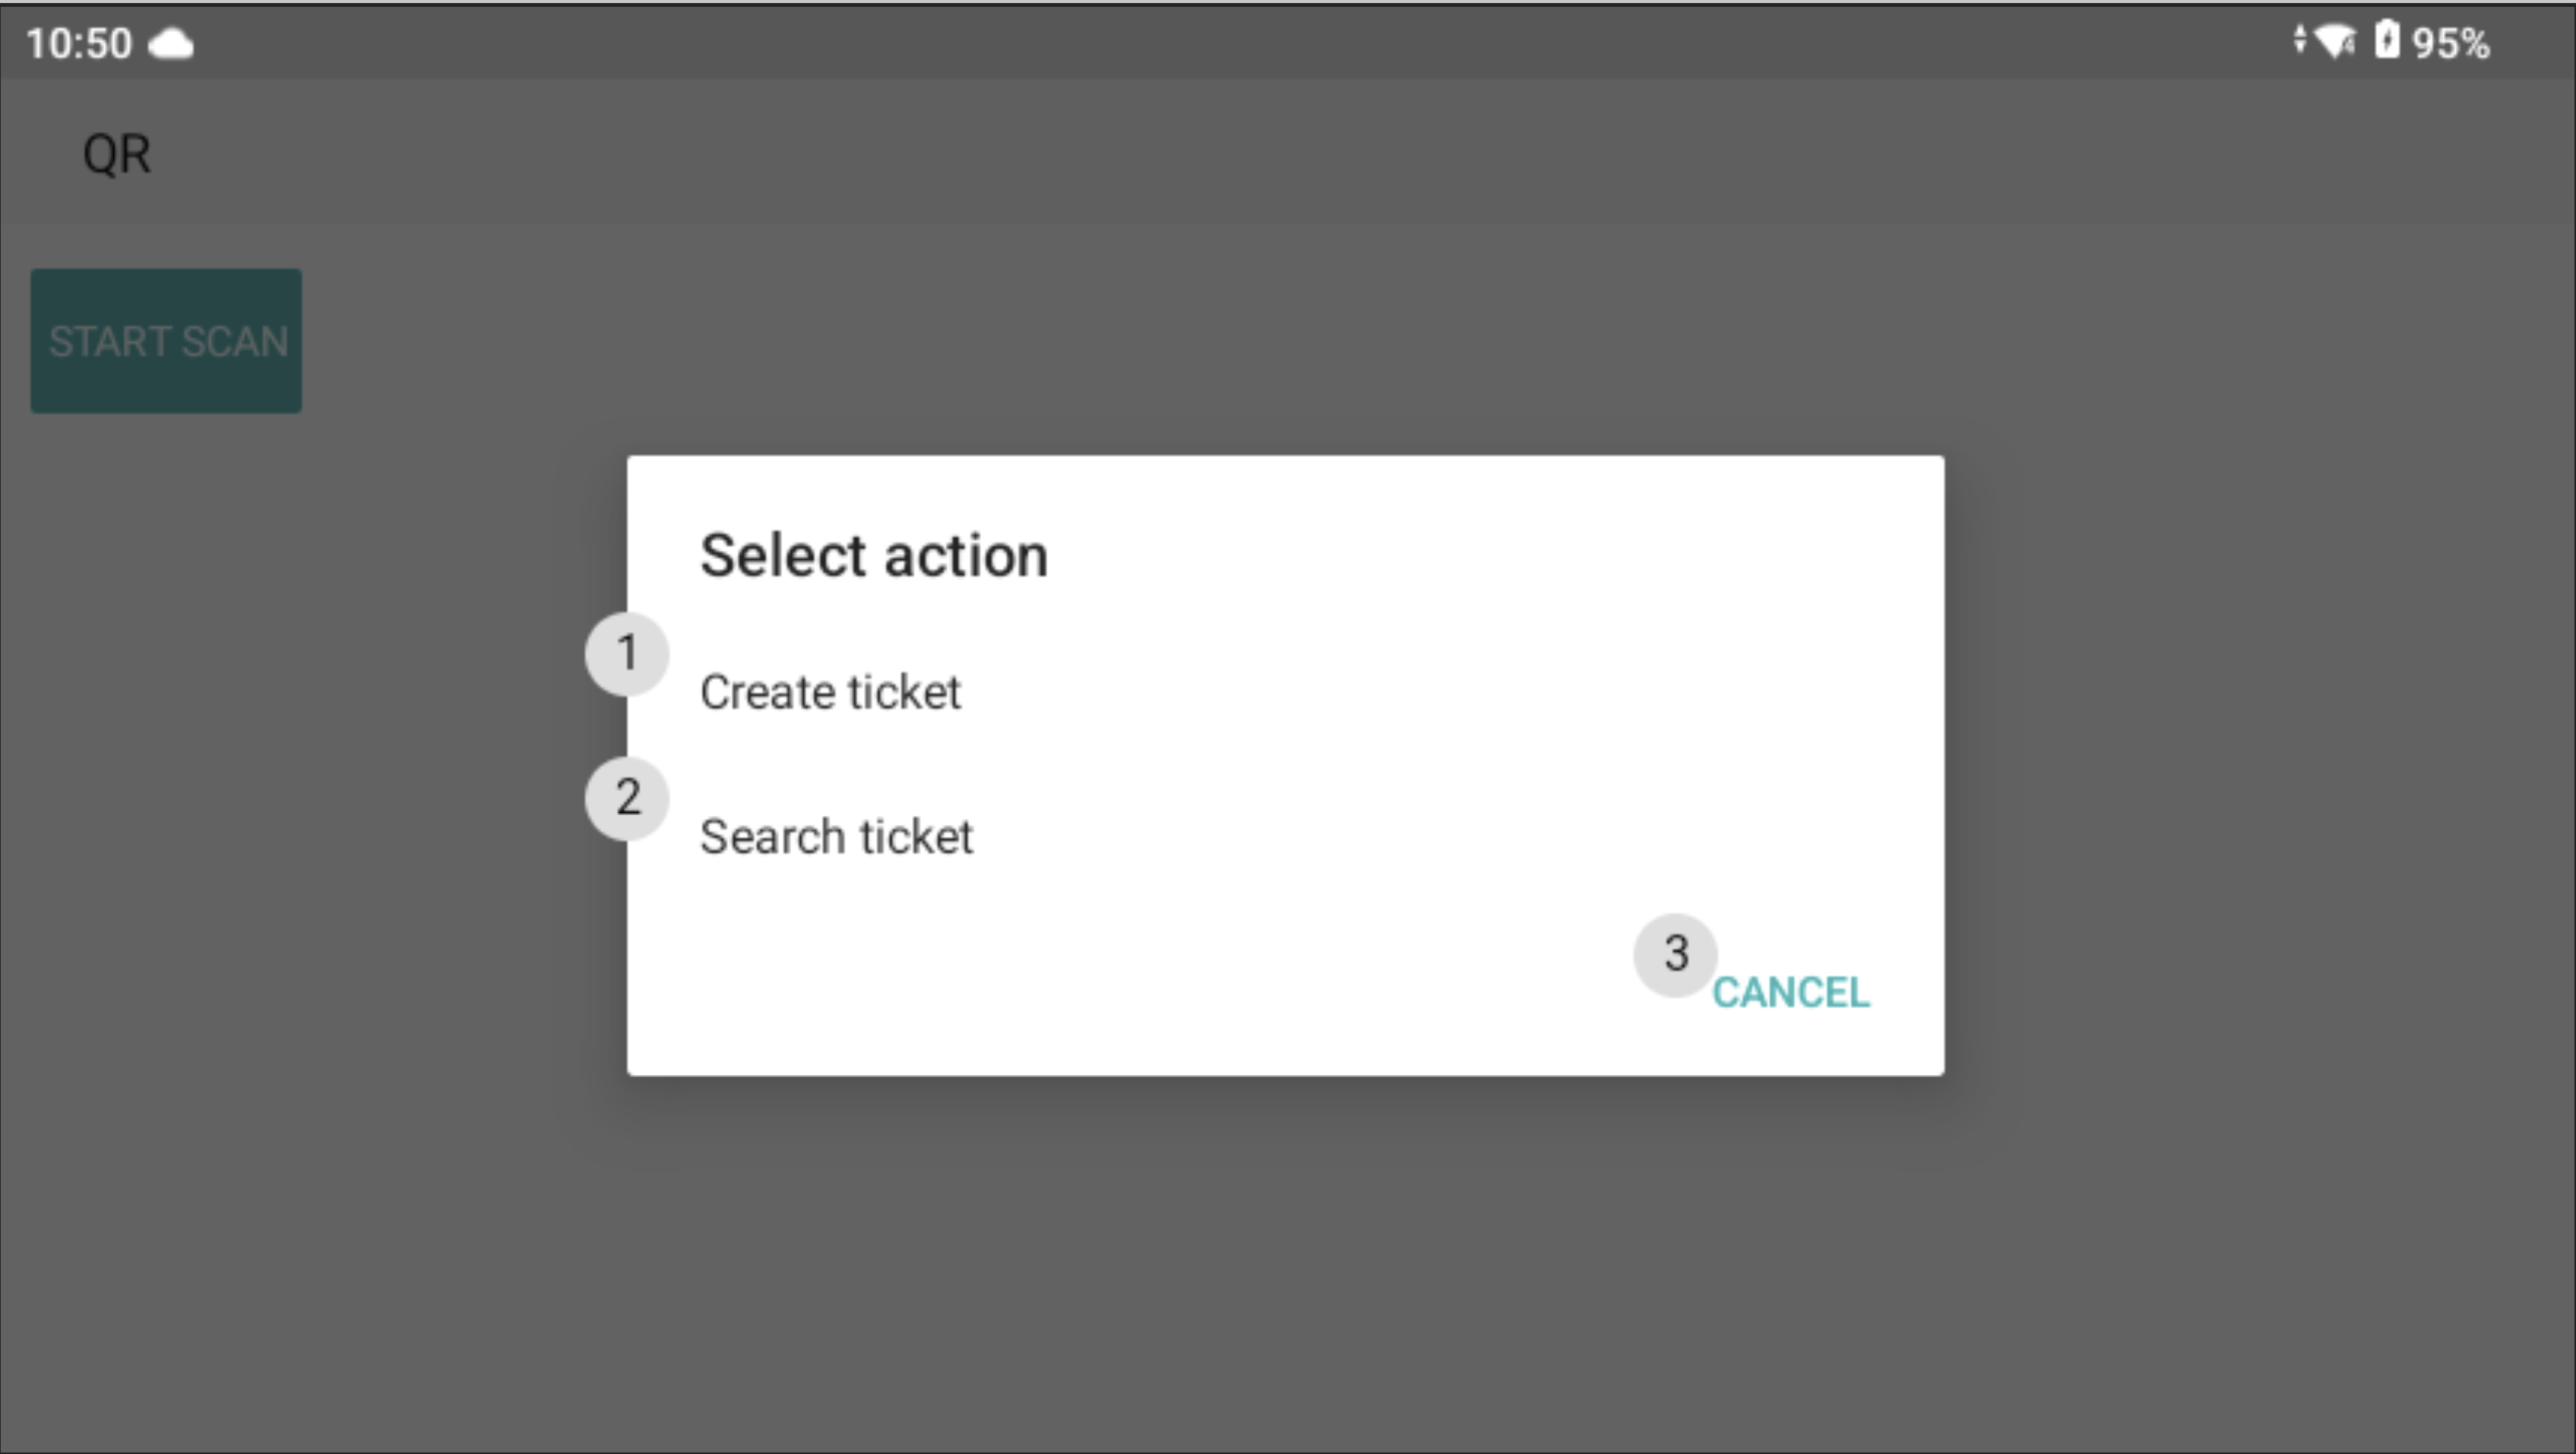
Actions after scanning a QR code